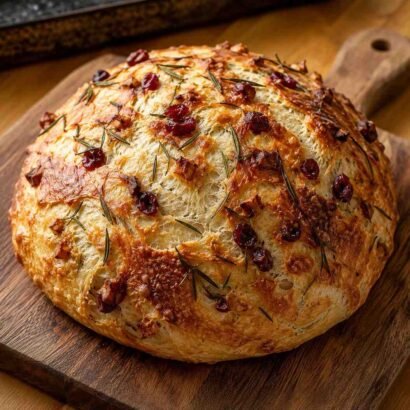
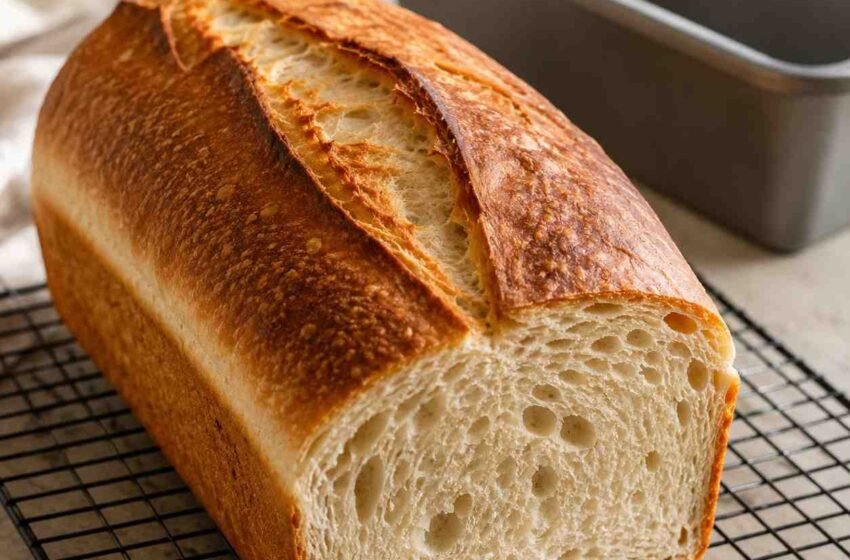
There’s nothing quite like the aroma of freshly baked sourdough bread filling your kitchen. With its golden crust, soft pillowy crumb, and subtle tang, sourdough sandwich bread has become a favorite for everything from breakfast toast to hearty sandwiches. This High-Protein Diabetic-Friendly Soft Sourdough Sandwich Bread takes the traditional loaf to the next level by incorporating higher-protein ingredients and extra fiber while maintaining the tender texture that makes sandwich bread so enjoyable. Every slice is soft enough for everyday sandwiches yet sturdy enough to hold your favorite healthy fillings.
Unlike many store-bought sandwich breads that rely heavily on refined flour, preservatives, and added sugars, this homemade version focuses on wholesome ingredients that support balanced nutrition. Bread flour provides strength and structure, while white whole wheat flour contributes extra fiber without making the loaf dense. A small amount of unflavored whey protein isolate and vital wheat gluten naturally increase the protein content while helping the dough develop an airy crumb. Greek yogurt keeps the bread exceptionally soft and moist, and the active sourdough starter develops incredible flavor through slow natural fermentation.
Whether you’re making healthy breakfast toast, meal-prep sandwiches, grilled cheese, avocado toast, or homemade French toast, this versatile loaf delivers outstanding results every time. Its soft texture, mild sourdough flavor, and beautiful golden crust make it a wonderful everyday bread that’s simple enough for beginner bakers while producing bakery-quality results. Once you taste a fresh slice straight from the oven, you’ll never look at store-bought sandwich bread the same way again.
Why You’ll Love This Recipe
- High in protein compared to traditional sandwich bread.
- Diabetic-friendly with increased fiber.
- Naturally fermented for incredible flavor.
- Soft and fluffy sandwich texture.
- Beautiful golden crust.
- Perfect for toast and sandwiches.
- Easy overnight fermentation.
- Great for beginner sourdough bakers.
- Freezes beautifully.
- Excellent for weekly meal prep.
- No preservatives.
- Uses wholesome pantry ingredients.
- Stays soft for several days.
- Family-friendly recipe.
Also CheckOut: 30-Day High-Protein Meal Plan for Weight Loss: Easy Recipes, Meal Prep Tips & Complete Nutrition Guide
Equipments
- Large Mixing Bowl (5-quart) – Provides enough room for mixing and fermenting the dough.
- Kitchen Scale – Ensures precise ingredient measurements for consistent sourdough results.
- Measuring Cups – Helpful if not weighing ingredients.
- Measuring Spoons – Measures yeast, salt, and other small ingredients accurately.
- Danish Dough Whisk or Wooden Spoon – Easily combines the sticky dough.
- Bench Scraper – Makes handling and shaping the dough much easier.
- Plastic Dough Scraper – Helps fold the dough during bulk fermentation.
- Loaf Pan (9 x 5-inch) – Produces a classic sandwich loaf shape.
- Plastic Wrap or Bowl Cover – Prevents the dough from drying out during fermentation.
- Kitchen Towel – Covers the dough during proofing.
- Instant-Read Thermometer – Confirms the bread is fully baked.
- Cooling Rack – Allows the loaf to cool while maintaining a crisp crust.
- Serrated Bread Knife – Creates clean slices without crushing the soft crumb.
Ingredients
Dry Ingredients
- 3 cups bread flour
- 1 cup white whole wheat flour
- ¼ cup unflavored whey protein isolate
- 2 tablespoons vital wheat gluten
- 2 tablespoons ground flaxseed
- 2 teaspoons fine sea salt
Wet Ingredients
- 1 cup active sourdough starter (100% hydration)
- ¾ cup warm water (about 80°F)
- ¼ cup plain nonfat Greek yogurt
- 2 tablespoons extra-virgin olive oil
Optional Egg Wash
- 1 large egg
- 1 tablespoon water
Optional Toppings
- Rolled oats
- Sesame seeds
- Pumpkin seeds
- Sunflower seeds
- Flaxseeds
Ingredient Notes
Bread Flour
- Bread flour forms the foundation of this loaf by providing the high gluten content needed for excellent structure and oven spring. Its stronger protein network creates the soft, chewy texture that’s ideal for sandwich bread while supporting the additional protein ingredients.
White Whole Wheat Flour
- White whole wheat flour adds valuable fiber and nutrients without making the bread overly dense. It has a milder flavor than traditional whole wheat flour, making it an excellent choice for a light sandwich loaf.
Active Sourdough Starter
- A healthy, bubbly sourdough starter naturally ferments the dough, developing complex flavor and improving digestibility. For the best rise, use a starter that has been fed 4 to 8 hours before mixing the dough.
Whey Protein Isolate
- Unflavored whey protein isolate boosts the protein content without noticeably affecting flavor. A moderate amount is used to maintain a soft crumb while enhancing nutritional value.
Vital Wheat Gluten
- Vital wheat gluten strengthens the dough, improves elasticity, and helps compensate for the additional whole grain flour and protein powder. It produces a taller loaf with a lighter, more open crumb.
Ground Flaxseed
- Ground flaxseed contributes fiber, omega-3 fatty acids, and a subtle nutty flavor. It also helps the bread retain moisture, allowing it to stay soft for longer.
Greek Yogurt
- Plain nonfat Greek yogurt adds moisture, tenderness, and additional protein. It also contributes slight acidity that complements the sourdough fermentation process and produces a wonderfully soft crumb.
Extra-Virgin Olive Oil
- Olive oil enriches the dough while helping create a tender texture. It also extends freshness by slowing staling after baking.
Sea Salt
- Salt enhances flavor while strengthening gluten development and regulating fermentation. Fine sea salt distributes evenly throughout the dough for consistent seasoning.
Warm Water
- Warm water hydrates the flour and helps activate fermentation. Water that’s too hot can weaken the natural yeast in the sourdough starter, so aim for approximately 80°F.
Egg Wash
- An optional egg wash creates a glossy golden crust and helps seeds adhere to the loaf if using toppings.
Seed Toppings
- Pumpkin seeds, sunflower seeds, sesame seeds, flaxseeds, or rolled oats add extra texture, nutrition, and visual appeal while complementing the mild sourdough flavor.
How to Make High-Protein Diabetic-Friendly Soft Sourdough Sandwich Bread
- Feed your sourdough starter approximately 4 to 8 hours before preparing the dough. It should be bubbly, active, and at its peak when measured for the recipe.
- In a large mixing bowl, combine the bread flour, white whole wheat flour, whey protein isolate, vital wheat gluten, ground flaxseed, and sea salt. Whisk thoroughly until the dry ingredients are evenly mixed.
- In a separate bowl, whisk together the active sourdough starter, warm water, Greek yogurt, and olive oil until smooth. The yogurt should blend completely into the liquid.
- Pour the wet ingredients into the bowl of dry ingredients. Using a Danish dough whisk or sturdy wooden spoon, stir until all of the flour is fully hydrated and a shaggy dough forms.
- Once no dry flour remains, use your hands or a plastic dough scraper to gently gather the dough into a rough ball. The dough should feel soft, slightly tacky, and elastic rather than stiff.
- Cover the bowl with plastic wrap or a reusable bowl cover and allow the dough to rest for 30 minutes. This autolyse period helps hydrate the flour and encourages gluten development without kneading.
- After resting, perform the first set of stretch-and-folds by gently lifting one side of the dough, stretching it upward, and folding it over the center. Rotate the bowl one-quarter turn and repeat until all four sides have been folded.
- Cover the dough and let it rest for another 30 minutes. Repeat the stretch-and-fold process three more times, spacing each session about 30 minutes apart. The dough will gradually become smoother, stronger, and more elastic with each fold.
- Once the final fold is complete, cover the bowl tightly and allow the dough to bulk ferment at room temperature for approximately 4 to 6 hours, or until it has increased in volume by about 50 to 75 percent. The exact time will depend on the strength of your starter and the temperature of your kitchen.
- Lightly flour your work surface and gently turn the dough out of the bowl using a bench scraper. Handle it carefully to preserve as many fermentation bubbles as possible.
- Flatten the dough lightly into a rectangle, then fold the short sides toward the center before rolling it tightly into a log. Pinch the seam closed to create tension along the surface of the loaf.
- Lightly grease a 9 x 5-inch loaf pan with olive oil. Place the shaped dough seam-side down into the pan and gently press it into an even shape.
- Cover the loaf pan loosely with plastic wrap or a clean kitchen towel. Allow the dough to proof until it rises about 1 inch above the rim of the pan, which typically takes 2 to 4 hours depending on room temperature and starter activity.
- Once the dough has risen about 1 inch above the rim of the loaf pan, preheat your oven to 375°F (190°C). Position the oven rack in the center for even baking.
- If using the optional egg wash, whisk together the egg and water until smooth. Using a pastry brush, lightly coat the top of the loaf to encourage a beautiful golden finish.
- Sprinkle rolled oats, sesame seeds, pumpkin seeds, sunflower seeds, or flaxseeds evenly over the egg wash if desired. Press them gently so they adhere during baking.
- Using a sharp bread lame or razor blade, make one long slash down the center of the loaf about ¼ inch deep. This controlled score allows the bread to expand evenly during baking and creates the classic artisan sandwich loaf appearance.
- Place the loaf pan into the preheated oven and bake for approximately 40 to 45 minutes, or until the crust is deeply golden brown and the loaf has risen beautifully.
- If the top begins browning too quickly during the final 10 to 15 minutes of baking, loosely tent the loaf with aluminum foil to prevent over-browning while allowing the interior to finish baking.
- Check for doneness by inserting an instant-read thermometer into the center of the loaf. The internal temperature should reach 200°F to 205°F (93°C to 96°C).
- Remove the loaf from the oven and allow it to rest inside the pan for about 10 minutes. This brief resting period helps the loaf set and makes removal easier.
- Carefully turn the bread out onto a wire cooling rack. Allow it to cool completely for at least one hour before slicing to preserve the soft crumb and prevent the interior from becoming gummy.
- Slice with a sharp serrated bread knife into even sandwich slices. Enjoy fresh with nut butter, avocado, eggs, grilled chicken, turkey, or your favorite healthy sandwich fillings.
Recipe Information
- Prep Time: 35 minutes
- Bulk Fermentation: 4 to 6 hours
- Final Proof: 2 to 4 hours
- Bake Time: 40 to 45 minutes
- Cooling Time: 1 hour
- Total Time: Approximately 8 to 12 hours
- Servings: 16 slices
- Cuisine: American
- Course: Bread
Flavor Profile Breakdown
- Mild tangy sourdough flavor.
- Soft, fluffy sandwich crumb.
- Light nutty notes from flaxseed.
- Slight richness from olive oil.
- Balanced whole wheat flavor.
- Golden tender crust.
- Fresh homemade aroma.
- Perfectly mild for sweet or savory toppings.
Pro Tips for Best Results
- Use an active, recently fed sourdough starter.
- Measure ingredients with a kitchen scale whenever possible.
- Allow the dough to ferment fully for the best flavor.
- Perform all stretch-and-fold sessions gently.
- Avoid adding excessive flour during shaping.
- Proof until the dough rises above the loaf pan.
- Cool completely before slicing.
- Store the loaf in a bread box for maximum freshness.
Variations & Substitutions
- Replace olive oil with avocado oil.
- Add chopped walnuts for texture.
- Mix in sunflower seeds.
- Include sesame seeds throughout the dough.
- Add fresh rosemary for an herbed loaf.
- Mix in roasted garlic for extra flavor.
- Sprinkle everything bagel seasoning on top.
- Add shredded Parmesan cheese before baking.
Common Mistakes to Avoid
- Using an inactive sourdough starter.
- Skipping the autolyse resting period.
- Overproofing the dough.
- Underproofing before baking.
- Slicing while still warm.
- Forgetting to score the loaf.
- Using too much flour while shaping.
- Removing the loaf from the oven too early.
Serving Suggestions
- Toast with natural peanut butter.
- Top with mashed avocado and eggs.
- Make grilled chicken sandwiches.
- Prepare healthy turkey sandwiches.
- Serve alongside vegetable soup.
- Enjoy with cottage cheese and tomatoes.
- Make French toast.
- Pair with homemade chili.
- Serve with olive oil and herbs.
- Use for breakfast toast with berries.
Storage & Reheating Tips
- Store completely cooled bread in a bread box or airtight container.
- Keep at room temperature for up to 3 days.
- Refrigerate for up to 1 week.
- Freeze sliced bread for up to 3 months.
- Toast slices directly from frozen.
- Refresh the loaf in a 325°F (163°C) oven for 8 to 10 minutes.
- Store with the cut side facing down to reduce drying.
- Slice only as needed to preserve freshness.
Nutrition Information (Approximate)
- Calories: 165 kcal
- Protein: 9 g
- Carbohydrates: 19 g
- Fat: 3.5 g
- Fiber: 3 g
- Sugar: 1 g
- Sodium: 220 mg
Final Thoughts
This High-Protein Diabetic-Friendly Soft Sourdough Sandwich Bread delivers everything you love about classic homemade sandwich bread while offering a more nutritious twist. Its naturally fermented dough creates outstanding flavor, while the added protein and fiber make every slice more satisfying. With its soft, fluffy crumb, beautiful golden crust, and incredible versatility, this loaf is perfect for everyday sandwiches, toast, meal prep, or family breakfasts. Once you experience how soft, flavorful, and rewarding homemade sourdough can be, you’ll want to keep this recipe in your regular baking rotation.
FAQs
Can I make this bread without whey protein isolate?
Yes. The loaf will still bake beautifully, although the protein content will be slightly lower and the crumb may be a bit softer.
Why is my sourdough bread dense?
A dense loaf is usually caused by an inactive starter, underproofing, or insufficient gluten development during the stretch-and-fold process.
Can I refrigerate the dough overnight?
Yes. After bulk fermentation, you can refrigerate the shaped dough overnight and bake it the next day for even deeper sourdough flavor.
Do I need a stand mixer?
No. This recipe is specifically designed to be mixed by hand using simple stretch-and-fold techniques.
Can I freeze the bread?
Absolutely. Slice the loaf before freezing so individual slices can be removed and toasted as needed.
How do I know when the bread is fully baked?
The crust should be deep golden brown, and the center should register between 200°F and 205°F with an instant-read thermometer.
Can I use all bread flour instead of white whole wheat flour?
Yes. The loaf will be slightly softer and lighter, although it will contain less fiber.
How should I store homemade sourdough sandwich bread?
Store it in a bread box or airtight container at room temperature for up to 3 days, or freeze slices for longer storage.