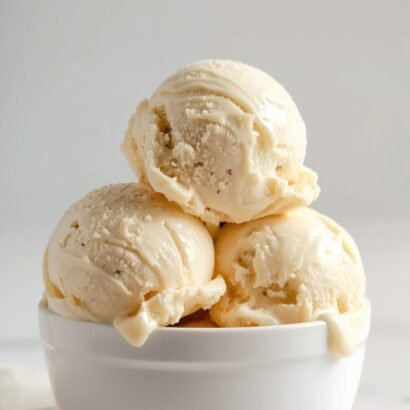

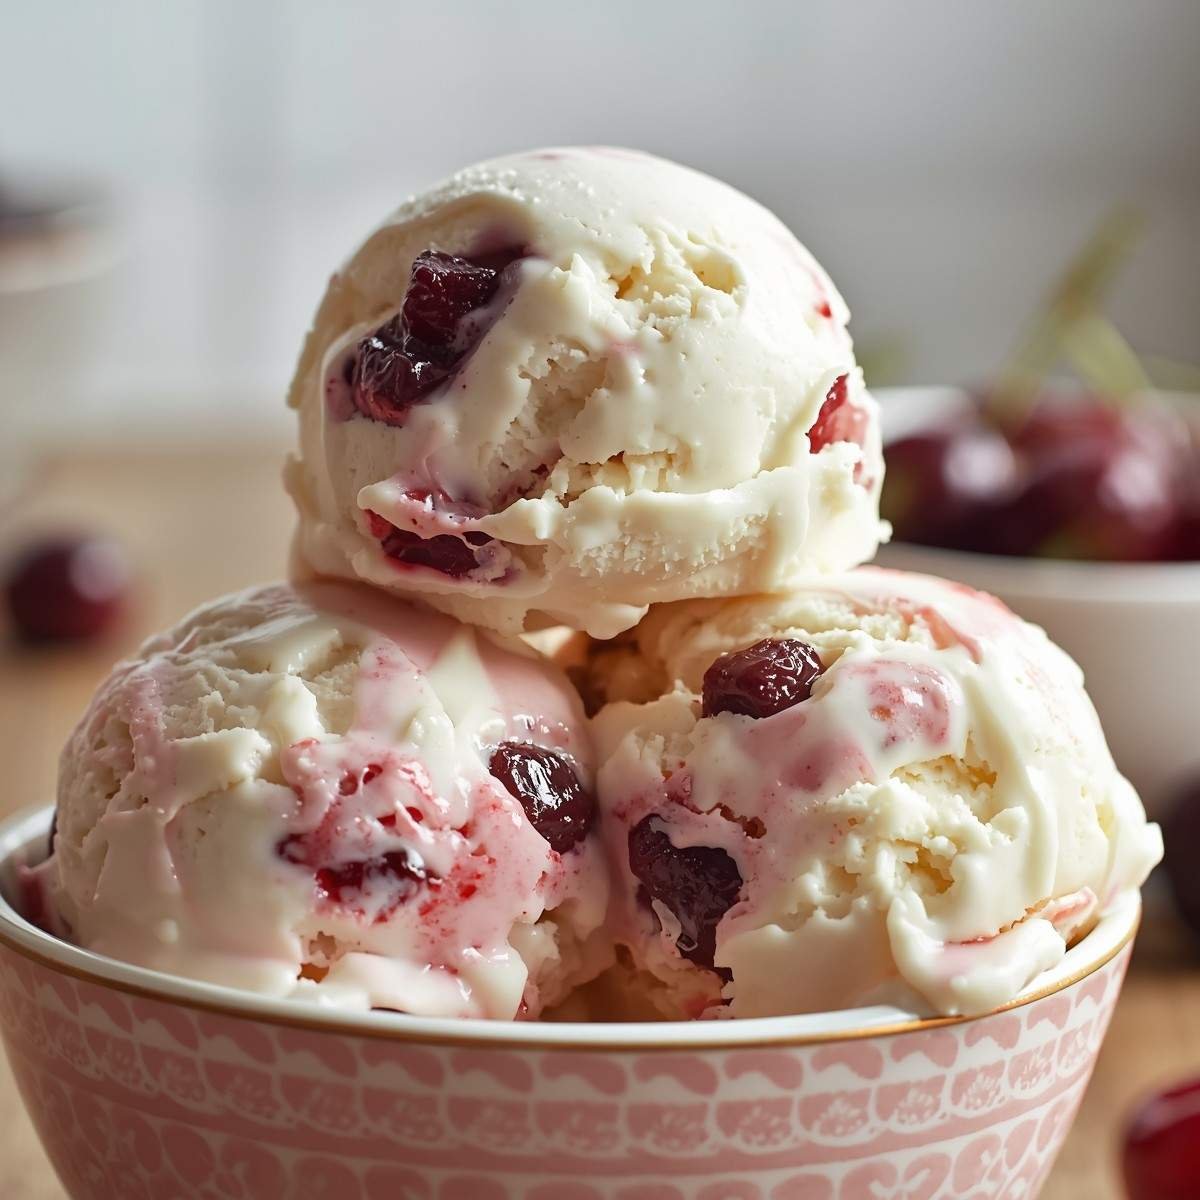
There’s nothing quite like the combination of sweet cherries and smooth vanilla ice cream, especially when it’s made fresh in your own kitchen. This creamy cherry vanilla ice cream brings together juicy fruit swirls and a rich vanilla base, creating a dessert that feels both refreshing and indulgent. Each bite delivers bursts of cherry flavor balanced perfectly with a velvety texture.
Homemade ice cream may sound complicated, but this recipe keeps things simple while delivering premium results. Using fresh ingredients like cream, milk, sugar, and cherries, you can create a dessert that rivals your favorite ice cream shop. The natural sweetness of cherries combined with classic vanilla makes this recipe a timeless favorite that’s perfect for warm days or special occasions. Cherry ice cream has long been loved for its fruity flavor blended with creamy dairy ingredients, making it a classic dessert choice worldwide .
Why You’ll Love This Recipe
- Rich and creamy texture with real fruit chunks
- Perfect balance of sweet vanilla and tangy cherries
- Easy to make with simple ingredients
- No artificial flavors or preservatives
- Customizable with mix-ins like chocolate or nuts
- Ideal for summer treats or special desserts
Ingredients
- 2 cups heavy cream – creates a rich and creamy base
- 1 cup whole milk – balances the texture and smoothness
- 3/4 cup granulated sugar – sweetens the ice cream evenly
- 1 tablespoon pure vanilla extract – adds classic flavor
- 1/8 teaspoon salt – enhances overall taste
- 2 cups fresh cherries, pitted and chopped – provides natural sweetness and texture
- 1 tablespoon lemon juice – brightens the cherry flavor
Equipments
- Mixing bowl (2–3 quart capacity) – for combining ingredients
- Ice cream maker (2 quart size recommended) – for smooth churning
- Saucepan (medium size) – for preparing cherry mixture
- Whisk or hand mixer – for dissolving sugar
- Airtight freezer-safe container (1–2 quart) – for storage
- Measuring cups and spoons – for accuracy
- Spatula – for easy transfer
How to Make Creamy Homemade Cherry Vanilla Ice Cream
- In a saucepan, combine chopped cherries, a few tablespoons of sugar, and lemon juice, then cook over medium heat until softened and slightly thickened
- Remove from heat and allow the cherry mixture to cool completely before using
- In a mixing bowl, whisk together whole milk and remaining sugar until dissolved
- Add heavy cream, vanilla extract, and salt, mixing until smooth and fully combined
- Chill the mixture in the refrigerator for at least 2 hours for best texture
- Pour the chilled base into the ice cream maker and churn according to instructions until it reaches a soft-serve consistency
- Gently fold in the cooled cherry mixture, creating swirls throughout the ice cream
- Transfer to an airtight container and freeze for 4–6 hours until firm
Recipe Information
- Prep Time: 20 minutes
- Chill Time: 6 hours
- Total Time: 6 hours 20 minutes
- Servings: 6
- Cuisine: American
- Course: Dessert
Flavor Profile Breakdown
- Creamy richness from heavy cream
- Sweet and floral notes from vanilla
- Juicy, slightly tart bursts from cherries
- Balanced sweetness with a hint of freshness
- Smooth and velvety consistency
Pro Tips for Best Results
- Use ripe, fresh cherries for the best flavor
- Chill the mixture thoroughly before churning
- Do not overcook the cherries to retain texture
- Use high-quality vanilla extract for depth
- Freeze in a shallow container for even consistency
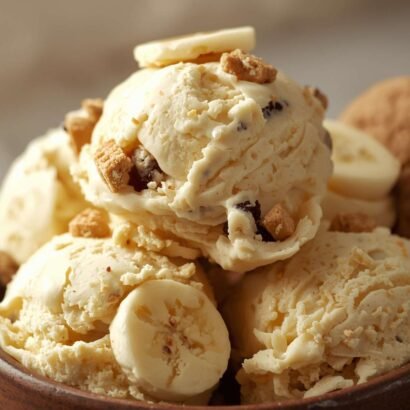
Variations & Substitutions
- Add chocolate chunks for a cherry chocolate twist
- Use frozen cherries if fresh are not available
- Replace sugar with honey or maple syrup
- Try almond extract for a deeper flavor profile
- Use coconut milk for a dairy-free version
Common Mistakes to Avoid
- Skipping the chilling step before churning
- Using low-fat dairy, resulting in icy texture
- Overmixing after adding cherries
- Not storing properly, leading to freezer burn
- Adding warm cherry mixture to the base
Serving Suggestions
- Serve in bowls or waffle cones
- Pair with brownies or chocolate cake
- Top with whipped cream or chocolate drizzle
- Add fresh cherries for garnish
- Use in milkshakes or dessert sundaes
Storage & Reheating Tips
- Store in an airtight container in the freezer
- Best consumed within 2 weeks
- Cover surface with plastic wrap to prevent ice crystals
- Let sit at room temperature for 5–10 minutes before scooping
- Avoid refreezing melted ice cream
Nutrition Information (Approximate)
- Calories: 300 kcal
- Protein: 3 g
- Carbohydrates: 28 g
- Fat: 20 g
- Fiber: 1 g
- Sugar: 24 g
- Sodium: 40 mg
Creamy Homemade Cherry Vanilla Ice Cream
Ingredients
Method
- In a saucepan, combine chopped cherries, a few tablespoons of sugar, and lemon juice, then cook over medium heat until softened and slightly thickened
- Remove from heat and allow the cherry mixture to cool completely before using
- In a mixing bowl, whisk together whole milk and remaining sugar until dissolved
- Add heavy cream, vanilla extract, and salt, mixing until smooth and fully combined
- Chill the mixture in the refrigerator for at least 2 hours for best texture
- Pour the chilled base into the ice cream maker and churn according to instructions until it reaches a soft-serve consistency
- Gently fold in the cooled cherry mixture, creating swirls throughout the ice cream
- Transfer to an airtight container and freeze for 4–6 hours until firm
Notes
- Protein: 3 g
- Carbohydrates: 28 g
- Fat: 20 g
- Fiber: 1 g
- Sugar: 24 g
- Sodium: 40 mg
Final Thoughts
This creamy homemade cherry vanilla ice cream is a delightful combination of fruity freshness and classic vanilla richness. It’s easy to prepare, incredibly satisfying, and perfect for anyone who loves homemade desserts. Once you try it, you’ll find yourself making it again and again, experimenting with new flavors and toppings.
FAQs
Can I use frozen cherries instead of fresh?
Yes, frozen cherries work well. Just thaw and drain excess liquid before using.
Do I need an ice cream maker for this recipe?
An ice cream maker gives the best texture, but you can freeze and stir manually every 30 minutes as an alternative.
How do I prevent ice crystals from forming?
Use full-fat ingredients and store the ice cream in an airtight container with minimal air exposure.
Can I make this recipe dairy-free?
Yes, substitute coconut milk or almond milk for a dairy-free version, though texture may vary.
How long does homemade ice cream last?
It stays fresh for up to 2 weeks when stored properly in the freezer.
Can I add mix-ins like chocolate chips?
Absolutely, fold them in during the final minutes of churning for best results.