
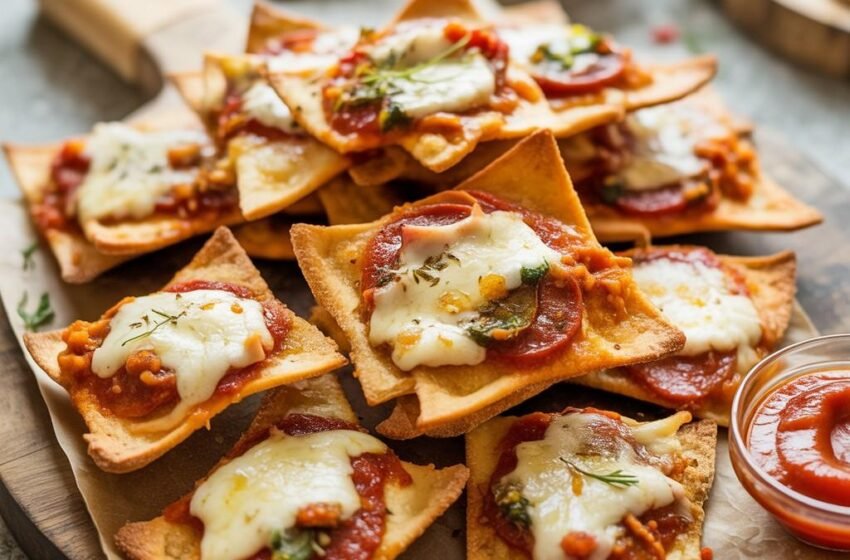
If you’ve ever wished pizza could be a crunchy, snackable delight, these Crispy Pizza Chips are your new favorite quick treat. Born from a simple kitchen whip-up using leftover tortillas, they turn into a gooey, cheesy, and crispy masterpiece in less than 15 minutes. This recipe is a must-try for every movie night, casual get-together, or quiet evening at home. The flavors hit all the right notes—zesty veggies, melted cheese, and that satisfying crunch in every bite. Whether you’re sharing with friends or indulging solo, they deliver pure snacking joy that feels both delicious and satisfying.
What I love about these pizza chips is how versatile they are—a canvas for creativity that lets you pile on your favorite toppings or even go gluten-free with gluten-free tortillas. The combination of crispy tortilla, gooey cheese, and irresistible flavor makes them the ultimate party food or quick snack for everyone. They’re easy, customizable, and full of creative variations that keep your snacking game dazzling. Once you try them, they’ll become a staple in your home — a simple, fun, and utterly delicious way to enjoy your favorite flavor combinations anytime.
Step-by-Step Instructions
1. Prep the Tortillas
Lay out your corn or flour tortillas on a clean cutting board. Using kitchen scissors or a sharp knife, slice each tortilla into 6–8 chip-sized triangles. This gives you the perfect crunchy “pizza chip” shape.
2. Add the Pizza Sauce
Spread a thin layer of pizza or marinara sauce over each tortilla triangle. Thicker sauces work best because they keep the chips crisp instead of soggy.
3. Sprinkle the Cheese
Top each triangle with shredded mozzarella. You can mix in cheddar, Parmesan, or provolone for extra flavor and that irresistible ooey-gooey melt.
4. Add Your Favorite Toppings
Scatter your chosen toppings—pepperoni, olives, bell peppers, mushrooms, jalapeños, or even cooked sausage. Feel free to customize for gluten-free, keto-friendly, or veggie-packed variations.
5. Season to Perfection
Sprinkle the chips with Italian herbs, garlic powder, and crushed red pepper flakes for a warm, aromatic boost that tastes like classic pizzeria flavor.
6. Bake Until Crispy
Place the chips on a parchment-lined baking sheet. Bake at 400°F (200°C) for 8–12 minutes, or until the edges are crispy and the cheese is bubbling and golden.
7. Serve & Enjoy
Let the chips cool slightly, then dig in! Serve them with extra marinara, ranch, or garlic dip for the ultimate snacking experience.
Nutrition Facts (Per Serving)
- Calories: ~150
- Protein: ~9g
- Carbohydrates: ~22g
- Fat: ~10g
- Fiber: ~2g
- Sugar: ~3g

Ingredients
Method
- Preheat your oven to 400°F (200°C) — this temperature is crucial for achieving that perfect crispy texture every time.
- Prepare your tortillas by using a sharp knife or pizza cutter to slice them into triangles or squares. Aim for uniform shapes to ensure even cooking.
- Line a baking sheet with parchment paper to prevent sticking. Arrange the tortilla pieces in a single layer, making sure they don’t overlap.
- Add the sauce by using a spoon to spread a thin layer of pizza sauce or marinara over each chip. Be careful not to overload so they stay crispy.
- Add cheese and toppings next. Generously sprinkle shredded mozzarella cheese over the chips, then add your selected toppings according to your liking.
- Season by drizzling your favorite seasonings — try Italian herbs, garlic powder, or crushed red pepper flakes to elevate the flavor.
- Bake the baking sheet in the oven for 10–12 minutes until the cheese is bubbling and the edges of the chips are golden brown.
- Cool the chips for a few minutes after removing from the oven. This short cooling time allows them to firm up and enhances their crunch.
Notes
FAQs
1. Can I make these pizza chips gluten-free?
Absolutely! Simply swap in gluten-free tortillas. They crisp up beautifully and make this a perfect snack for gluten-free and healthy eaters.
2. What toppings work best for pizza chips?
Classic mini pepperoni, diced bell peppers, chopped olives, mushrooms, jalapeños, or even pineapple all work great. For keto or low-carb versions, load up on high-protein toppings like sausage, cheese, and pepperoni.
3. How do I store leftover pizza chips?
Store completely cooled chips in an airtight container for up to 2 days. To re-crisp, pop them back into the oven or air fryer for 2–3 minutes.
4. Can I make these in an air fryer?
Yes! Air fry at 375°F (190°C) for about 5–7 minutes. Keep an eye on them—air fryers cook faster, and the chips crisp up quickly.
5. Can I use low-fat or vegan cheese?
Definitely. Low-fat cheese works well for a healthier twist, while vegan cheese melts beautifully for a dairy-free option. Just choose a thicker sauce to prevent sogginess.
6. Are these pizza chips good for parties or game day?
They’re perfect! These easy, customizable chips are ideal for game days, casual gatherings, movie nights, and even quick appetizers during holidays like Thanksgiving or Christmas.